
Traditional French Bread with Danielle Forestier
Season 2 Episode 4 | 24m 6sVideo has Closed Captions
Chef Danielle Forestier shares her technique for making a traditional French baguette.
Chef Danielle Forestier shares her technique for making a traditional French baguette at home.
Problems with Closed Captions? Closed Captioning Feedback
Problems with Closed Captions? Closed Captioning Feedback
Traditional French Bread with Danielle Forestier
Season 2 Episode 4 | 24m 6sVideo has Closed Captions
Chef Danielle Forestier shares her technique for making a traditional French baguette at home.
Problems with Closed Captions? Closed Captioning Feedback
How to Watch Baking With Julia
Baking With Julia is available to stream on pbs.org and the free PBS App, available on iPhone, Apple TV, Android TV, Android smartphones, Amazon Fire TV, Amazon Fire Tablet, Roku, Samsung Smart TV, and Vizio.
Visit the Julia Child Experience
Get recipes, read tributes from celebrity chefs, and more. Bon appetit!Providing Support for PBS.org
Learn Moreabout PBS online sponsorshipBoom!
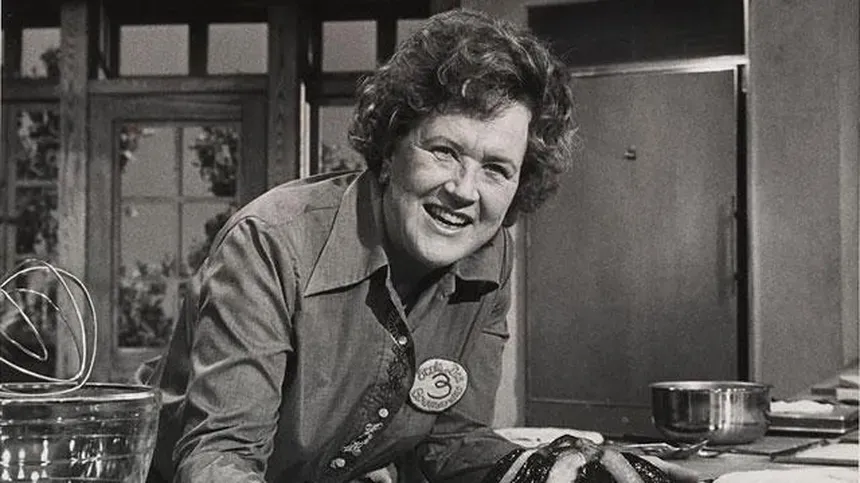
Hello, I'm Julia Child.
Welcome to my house.
What fun we're going to have baking all kinds of incredible cakes, pies and breads right here in my own kitchen.
Master baker Danielle Forestier learned her craft in France from the famous boulanger, Professor Raymond Calvel.
Today she shares her technique for baking the classic baguette.
Join us on... [Captioning sponsored by VIEWERS LIKE YOU] If you're tired of this kind of miserable-looking so-called "French bread" and would like to get a real French baguette here is Danielle Forestier who's going to teach us how to make it at home in our own ovens.
So, shall we make bread?
Well, let's make bread, good.
Let's start with bread flour.
It's important that it be bread flour because we want to let the gases in the dough rise and make a beautiful baguette, so we don't want cake flour or all-purpose flour that will be porous.
So we have a... not quite a pound and a half here, which is five cups.
And we'll make it by hand... Oh, good.
we could do the same thing by machine...
But it's nice to see it by hand.
You see, if what we're seeing here by hand if we were doing it by machine we'd get the same thing it wouldn't take quite as long.
So we'll make a little well in the center.
I'm going to work with one hand and leave one hand clean.
Well, that's a good idea.
In case the phone rings.
So I'm adding, um, water that is... has been cooled.
And at the end of the kneading process I would like my dough to be 77 or 78 degrees Fahrenheit.
Temperature is important, yeah.
Temperature is important because if you have a 78-degree dough you will have a dough that requires 90 minutes to rise and that's just right for getting the maximum flavor.
So the first procedure in making your bread is simply mixing and that's what it... indeed is called in French, it's a mix.
And we're looking for an homogenous flour-water mix I've not added anything but flour and water.
And sometimes your flour requires a little more and sometimes a little less.
And you can't make a recipe for the amount of water.
No.
Because your flour's a bit different every time.
One time it may have been delivered from the truck that went through the mountains and another across the desert, so... ( laughing ): You don't know.
It's not going to be the same each time.
If you're doing it in a machine then you'd just gradually add the water the same way?
You keep your machine on low speed and you start with the flour in the machine and just add your water gradually... Just the same as you're doing here.
until all of your flour is moistened and until it feels like a medium-consistency dough.
Yeah.
Doesn't feel loose and soupy and doesn't feel tight.
And then your machine will do this next stage which I have to do by hand, which in French is called a fraisage.
And it's to thoroughly blend the flour and water because although we've mixed it here, we don't have... an homogenous blend.
So, with the heel of my hand I'm going to just move the dough...
I can see that that really...
It's going to mix it, isn't it?
Yeah, mm-hmm.
And just go across your whole dough mass.
If you have to do it twice, that's fine I think we'll only have to do it once.
Well, you're being very thorough and taking small bits.
We don't want to leave any of those little dry lumps.
Now this is just mixed, it's not been kneaded.
And we're going to let it sit here for 15 minutes... Mm-hmm.
so that the protein in the flour can get nice and moistened.
So while it's sitting, why don't we prepare our oven and get it ready for the baking?
There you are.
Okay, Julia, let's bake our French loaves on tiles, so that... Well, we've already got a pizza stone in there.
That's great, a baking stone.
If you don't have a baking stone you can just use quarry tiles.
You just go to the... and these are just terra-cotta.
They just... these happen to be unglazed they can be unglazed or glazed, can't they?
What we want to do is put our dough in the oven... right directly onto a hot surface so that all the way around the loaf is nice and hot and the heat doesn't have to go through a pan or a baking sheet to get to the dough.
You get much more volume, don't you?
Yes, and that's what we're after in a French baguette.
We want the maximum volume and a very, very light loaf.
Well, the oven has been set to 425 F. So when we're ready to bake it will be hot enough.
Now, this has been 15, 20 minutes-- 30 minutes is okay.
And now we're going to add our yeast our salt, and knead it.
So...
This is about three-quarters of a cake of fresh yeast which is about one-half ounce.
Well, now supposing you were using... dry yeast, then what?
Well, if you use dry yeast you... have much better results if you add it to the water and since I like to add my water before the yeast... Ah.
I really do like to stay with the fresh yeast if I can.
This is the kneading... procedure.
Pick the dough up with one hand and as I put it down here on the bench... it bangs... the top's smooth surface.
And then pick it up and...
I take it with the other hand so that it's at a 90-degree angle.
So every time I knead it, it's getting a quarter of a turn.
And you still haven't put the salt in?
No, I would like the yeast to get nicely incorporated first, so that we don't...
Does the yeast...?
destroy the yeast with the salt.
So, what you want to do is do this about 800, 850 times.
Is it really 850 times?
It really is.
Less than that, you don't get the... You wouldn't knead this in the machine.
You could.
Then you would be turning it on a little bit higher speed and you just let the arm turn around approximately 800, 850 times.
You can add the salt as soon as you get your yeast nicely incorporated.
You just don't want to kill the... the yeast with touching... coming directly into contact with the salt.
That... in other words, you're giving the yeast all of the... its possible power.
That's right.
Now, are you using regular salt or kosher?
Either one.
Have you counted?
No, I haven't, but I know what it looks like.
Oh.
( laughing ) May I try once, see if I can do it?
Pick it up as you normally would do.
I pick...
There you go.
That gives it that quarter-turn.
There you go-- it all just falls right in place, doesn't it?
Yes, it does.
See how it... what a nice...
It has a lovely feel to it.
Okay, Julia, when we've gotten our 850... ( laughs ) abuses, we have a protein membrane that's very like a balloon.
That... that stretches in all directions.
Would you call that a gluten cloak?
That's a good word.
Yes, you can bend it and it just holds.
You can... and it's a multidirectional thing so that when the fermentation...
Yes, and you can feel... produces the CO2, it goes up and makes that dough rise rather than it coming up through it... Yeah, mm-hmm.
and it being a porous thing.
So... just want to finish it with all of the... ends underneath, so it's a firm-feeling... Mm, that is.
ball of dough.
It's already getting bubbles in it.
Is that the yeast starting to activate?
It's already beginning to ferment.
And remember, we wanted a dough of, ah, 77-78 degrees?
And indeed it is-- right on target.
So we're going to just let it sit here for 15 minutes and then give it what's called in French, a tour Okay.
which translates to "turn," but it's really kind of a fold.
Yeah.
So...
I'm going to take this one which we finished 15 minutes ago and you see how in the 15 minutes it's had an opportunity to relax and stretch out.
You don't cover it or anything?
I'll cover it later, I don't cover it now because I want to remember it didn't get its tour.
I see, yes, and this one is just like this 15 minutes later.
15 minutes later.
Fine, okay.
So, the smooth side I'm going to turn down.
And then at 3:00 and 9:00...
I'm going to pull it out and fold it in.
Yeah.
And at 6:00 and 12:00.
Yeah.
Turn it over and again do what we did before by taking those little corners and turn them in.
And are you now being more gentle with the bread not wanting it to...?
We have finished kneading it.
Now... now it needs to be treated with a little bit more respect.
And now what's this going to do?
Now it sits for about an hour and a half... an hour and a half, two hours.
That's its first rise?
That's its first fermentation, mm-hmm.
First fermentation.
Now, do we leave it uncovered or...?
No, let's cover it so that we know we've given it the tour and it's in its first fermentation.
And these are floured towels so that they won't stick.
Yeah.
We'll start checking it at about 60 minutes and see how it is.
And then, after it's gotten a full first rise... Then we'll go on.
We'll divide it and shape it, etc.
This first fermentation is absolutely essential for the flavor and for the appearance of your bread.
If you cheat on this one you can make it up later but it will never taste the same.
Yeah, okay.
Ooh, look at that.
This is our dough... 90 minutes into its development which is the first fermentation.
And there's a little bubble already.
And at this point... feel it, please, it feels like this.
It has a lovely... it has a light feel, doesn't it?
It does feel light, you can feel that something has happened inside there.
When you touch it, it begins to come back.
This is what we want it to look like.
Okay, so now we're going to scale it, we're going to weigh it.
And I like to weigh it because then we have our pieces exactly the same size and that's very helpful for a new baker.
For instance when you put it in the oven there's not one piece that's a little bit larger than the other.
They all bake the same, they all rise the same.
So a scale is probably the first piece of equipment So a scale is probably the first piece of equipment after a thermometer that a serious baker invests in.
So I'm going to take this piece of dough and I'm going to remove it from its board and place it smooth-side down on the bench and deflate it.
You really did deflate it.
With the whole flat of my hand.
Yeah.
Let's make three batards.
That's what we scaled this particular... A batard is shorter than a baguette?
A batard is... it's the same weight as a baguette but it's a different shape.
Because we don't have a long enough oven for a baguette.
For a baguette, sorry, no.
So it's... about 12 ounces is a typical Parisian baguette or batard.
And that's 12 ounces and then I'm going to just lightly ball it as I...
So you see, if I don't have quite enough weight I add a little more and then in the middle... and pick it up so that all the scraps end up on the inside.
Mmm.
And as I pick up the dough it becomes a little ball.
Yeah.
Now I have a little tiny bit of dough left over and being French I'll be economical.
Mm-hmm.
Very sensible, yeah.
We're going to let these rest just a few minutes because they're nervous.
Covered or...?
Oh, it's just a few minutes so they won't crust.
And that's the reason you'd cover it, to prevent a crust.
But it's not going to happen.
And we're going to shape them into the batard shape and then we're going to let them have their second fermentation.
And we will do that on a board on a towel.
And we're going to take a towel and flour it and work the flour into it.
Someone said to me, "How do you flour a towel?"
Well, it's important because you want all of those little spaces in the fabric to be clogged up with flour so that it won't stick to the dough.
So we're going to kind of move it in.
Now, when you've used your towels or your linens or your cloths a few times then they don't have to be floured anymore.
And you don't wash them?
You don't wash them!
You just keep them like that.
If you do wash them you don't tell anybody.
You just hang them on the oven door when you're finished so they dry out bone-dry.
So after you've used them they'll be damp.
You dry them and fold them up and put them in a baggy and save them for the next time.
So we have a floured towel.
Linen is better than cotton-- it doesn't stick as much-- if you can get linen.
Mm-hmm.
And we're going to make a little fold here to kind of support the first one-- Give it a little... a little kind of support and then as we lay our loaves in we'll just put a little fold of towel in between each of them to support the sides.
So now let's shape them.
All right.
Let's do a little flour on the bench...
So these dough pieces have rested just a few minutes-- not enough to begin rising again.
And what I want to do is... We have the smooth side up-- I want to pick it up so that the smooth side is down.
The same time I've sort of hit it against the bench and with the flat of my hand I'm going to expel all the gases.
Now with this hand I'm going to scooch the dough up and fold it over about a third.
If I pick it up with this hand and put it into the other hand it's automatically folded itself into thirds.
Smooth side down on the bench... Flat of my hand... Equalize the dough again.
See, we've got a nice... We're trying to get a dough mass that feels the same all the way through it.
Even.
I'll do it again.
With my left hand scooch it up a third over... pick it up... and put it in the other hand so that it folds up into thirds.
Smooth side down.
So, I'm going to take the heel of my hand and make a groove across the dough piece.
Because it's going to be a long piece of dough.
And the groove helps me to fold it.
Yeah.
So now I take the top piece of the dough... fold it down two-thirds... and with the same motion-- the heel of my hand-- seal it which also makes a groove, doesn't it?
And if you find it sticking you can just do that to get a little bit more flour on it.
Minimum flour because any flour we put on it now isn't part of the dough.
Top down two-thirds and seal.
Top meets the bottom... and seal.
That's three times you do that, isn't it?
Now we have a seam on the bottom sealed all the way across.
Not just here and there but all the way across so that our baguette will come out of the oven regular and even.
I've rolled it over so the seam side is down.
So I am going to take my hands like a little tent and use the fingertips and the heel of my hand and with that roll the dough back and forth across the counter.
It's the bench that's shaping the dough, not my hand.
So I don't have any pressure going on here-- All I am is pushing and pulling.
So once I get the momentum started I begin to spread my hands apart and when I get to the end, a little bit of pressure for a nice tapered end.
And if you need to equalize it at all anywhere, you can.
There's the seam side and you see this feels the same all the way through and looks the same all the way through.
It looks nice.
This is a batard, of course.
It's the same weight as a baguette-- a baguette would be just the same only we would extend it to baguette size.
Now that they are formed, I suppose they have to have another rise, don't they?
I think so-- we want them to be a little bigger than this.
Is that a fermentation?
A second fermentation.
Okay, let's do it!
We're going to put them on our floured towel... Seam side up.
Seam side up... And you can clearly see the seam too, can't you?
Mm-hmm.
So these are our three batards that will fit in our oven.
They're now going to sit here for about an hour.
About an hour.
We'll look at them and see when they're correct.
So let's put them in a warm place.
We've got the towel over them so they don't get any drafts and they won't crust so they can continue to rise later.
And let's let them be in an environment about 80 or... About 80.
80, 85.
I have a warming oven I'll put them in.
As long as it's turned off so it doesn't get too hot.
It's well calibrated.
Oh, there they are.
And they are really beautifully risen, aren't they?
So you can feel that they have grown since we've shaped them.
Yes, they certainly have.
We're going to slash them and put them in a steamy oven.
And we want to put them in a very humid environment so they'll expand to their absolute maximum before any crust begins to form.
Okay.
So, I'm going to throw some water in the oven.
Half a cup, I see.
( water sizzling ) I can see the steam.
Now let's flip them onto the peel.
This is a damp day so they stick a little bit.
And they haven't been used that much as cloths.
Now I'm going to hold the razor blade almost parallel to the dough.
I'm going to start cutting at one tip and finish at the other.
I'm going to cut a slash a little bit more than a third of the batard.
I'm going to backtrack and overlap and with about a quarter of an inch separation, another one.
Same thing-- overlap, quarter of an inch separation and all the way to the tip.
Great!
You don't put any cornmeal on?
You don't need it.
I think a lot of people feel the cornmeal is essential or it isn't French bread.
Oh, no, we don't use that in France.
Oh, they don't?
It's not legal!
It's not flour, water, salt or yeast.
Can you help, perhaps... That's the trouble with this damp weather.
But it's nice to see you having sticky... because it's going to happen to all of us.
Linen does not do this quite as badly as cotton.
This would be a very good candidate to making a "P" out of... to cut it with scissors since it's not going to come out pretty as a baguette we can...
There's always a solution.
That's a good idea!
So it will come out looking like a little sheaf of wheat.
Yeah.
See if this will come off.
That's coming off all right.
Julia, it's been a minute or two, and I don't think there's much humidity left so I am going to humidify the oven again before I slash this.
It really has a lot to do with the expansion and the oven spring of your loaves.
You can see already how it's expanding.
Now it stays in the oven 20 minutes.
That's not very long.
No.
Okay.
Oh!
They look good, don't they?
They look wonderful!
You see, they're completely baked on the side.
We don't have any cream or blonde color there so they're colored all the way around.
That's how we want them.
And as long as you turn them over so that they're not flat side down they cool just fine with no rack or anything.
So we want to taste them after they've cooled.
Because this hasn't constituted so we just have to wait a minute.
No, it has no texture.
And it's not very digestible either.
In France, it's a law that you must leave the breads in a painetrie for 20 minutes before they can go on sale after they come out of the oven.
So if we wait for 20 minutes we can...
This loaf will be cool in 20 minutes.
Okay!
I'm dying to taste some of this bread!
Let's taste!
Okay!
Here's a loaf that's beautiful.
This is what you're looking to have your baguettes and your batards come out.
Look how it's popped open the oven spring and all of the different colors there.
And when we cut open a batard right on this place here we should have a great big hole.
And look it... And all of the holes are different sizes and different disbursements and it's not all the same hole structure all the way through like sliced bread is.
So that's what we're looking for.
That's delicious.
That has a lovely smell.
Danielle, thank you so much.
This has been a marvelous lesson.
I can't wait to try this out now.
You did beautifully.
You were wonderful to come and we all enjoyed it immensely.
Thank you very much-- my pleasure.
Julia: Bon appétit!


Support for PBS provided by: